trafficinsight
Well-Known Member
A week in the life of a little plane fixer
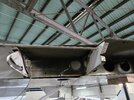
In the course of an annual inspection on a clean but well used old Cessna, we poked a mirror into the flap well and discovered a tiny indicator of big trouble... further inspection with a borescope revealed ouchies. Corrosion in the area of the joint between the inboard and outboard right wing aft spar. Very odd for this airplane as the interior was well coated with zinc chromate primer, though looking at the photo you can see that the lower edge of the spar was missed and this is likely the source of this corrosion issue.


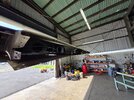
Owner wants it fixed so the first step is to disassemble the wing enough to understand the scope of the problem! Removed the flap and aileron. Removed the flap well closeout from the outboard flap track to the end of the flap well to expose the damaged area. Since the outer aft spar extends all the way to the wing rib just outboard of the aileron bellcrank, we needed to remove the aileron auxiliary spar all the way to the wingtip. From there I determined that the best course of action was to splice the damaged inboard section end and replace the entire outboard section. This required removal of the lower aft skin, all the aft rib sections, and the aileron bellcrank structure. We didn't think there was much chance of the wing twisting but supported it with jacks in strategic places anyway.


after drilling out the ribs and outer spar, a very nerve racking cut into the inner spar freed the entire assembly. separating the two pieces showed the full extent of the corrosion.


Continued...
In the course of an annual inspection on a clean but well used old Cessna, we poked a mirror into the flap well and discovered a tiny indicator of big trouble... further inspection with a borescope revealed ouchies. Corrosion in the area of the joint between the inboard and outboard right wing aft spar. Very odd for this airplane as the interior was well coated with zinc chromate primer, though looking at the photo you can see that the lower edge of the spar was missed and this is likely the source of this corrosion issue.
Owner wants it fixed so the first step is to disassemble the wing enough to understand the scope of the problem! Removed the flap and aileron. Removed the flap well closeout from the outboard flap track to the end of the flap well to expose the damaged area. Since the outer aft spar extends all the way to the wing rib just outboard of the aileron bellcrank, we needed to remove the aileron auxiliary spar all the way to the wingtip. From there I determined that the best course of action was to splice the damaged inboard section end and replace the entire outboard section. This required removal of the lower aft skin, all the aft rib sections, and the aileron bellcrank structure. We didn't think there was much chance of the wing twisting but supported it with jacks in strategic places anyway.
after drilling out the ribs and outer spar, a very nerve racking cut into the inner spar freed the entire assembly. separating the two pieces showed the full extent of the corrosion.
Continued...